Over the past years, I’ve been slowly deepening my connection with natural materials, not just through the land where I live, but through the art I create. One of the most personal and rewarding journeys has been learning how to make my own homemade watercolours.
This process has allowed me to work with pigments that are not only local, but also alive with the memory of rivers, trees and the seasons. In this article, I’ll walk you through the steps I followed to make my own mineral and lake pigments, and how I turned them into watercolours using a homemade binder. I’m not an expert by any means-just an artist learning by doing, experimenting with what nature offers.
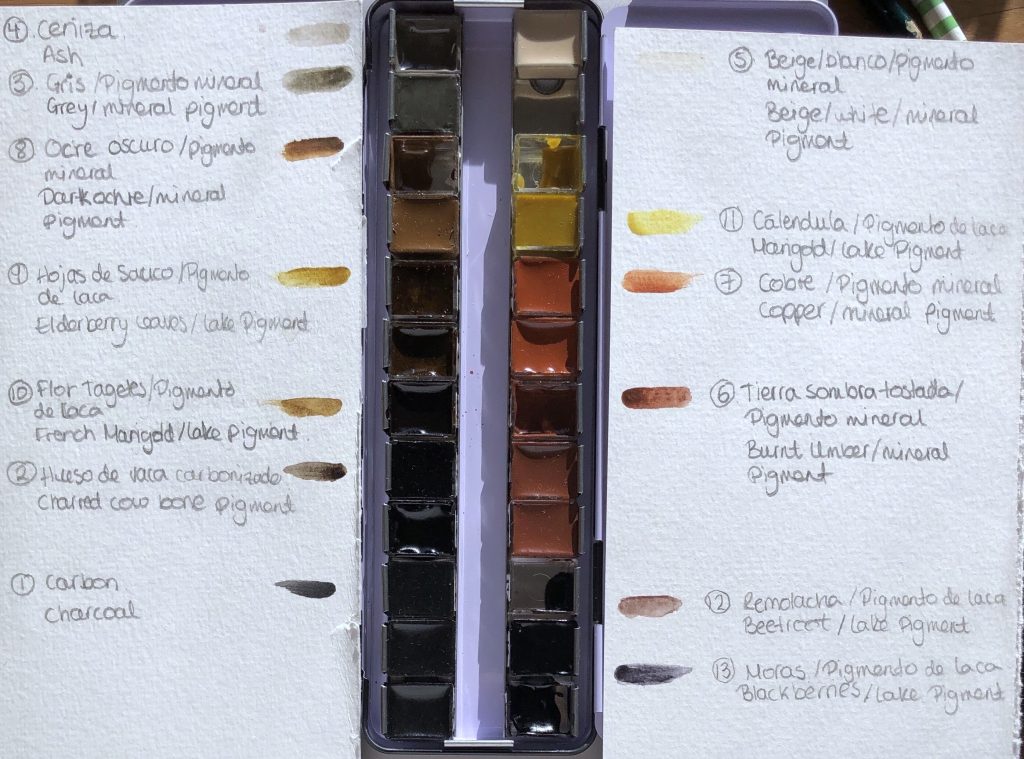
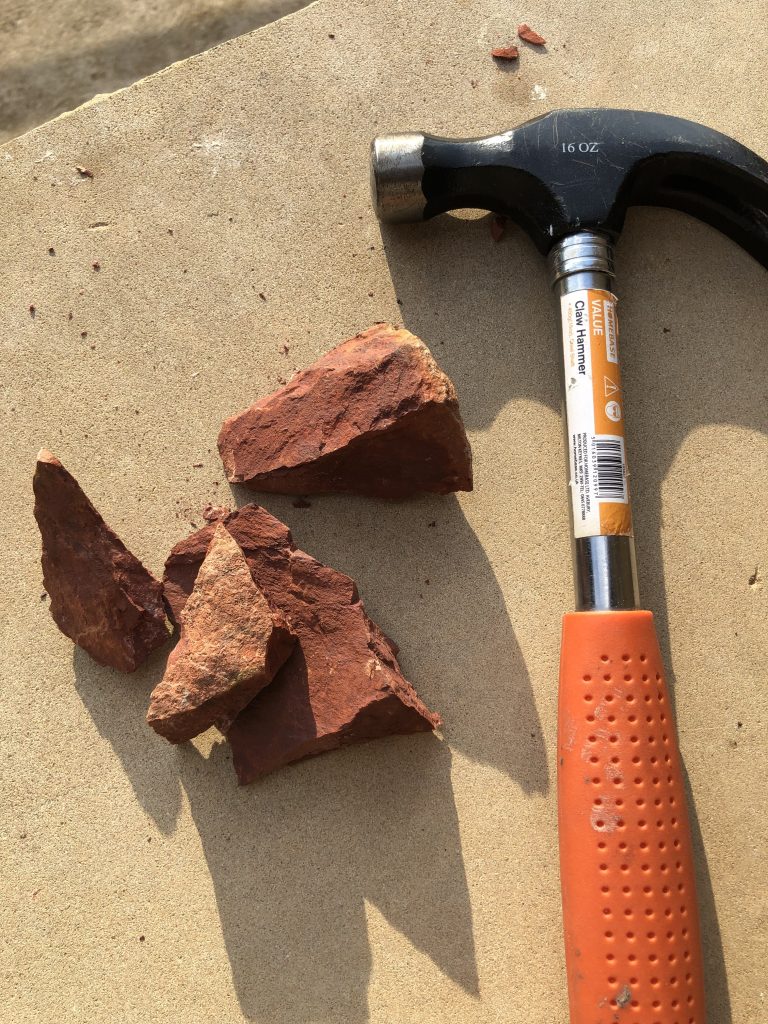
The first pigments I made came from rocks, ash and even charred bone. All of them were found in the area where I live-by the riverbanks or in the woods.
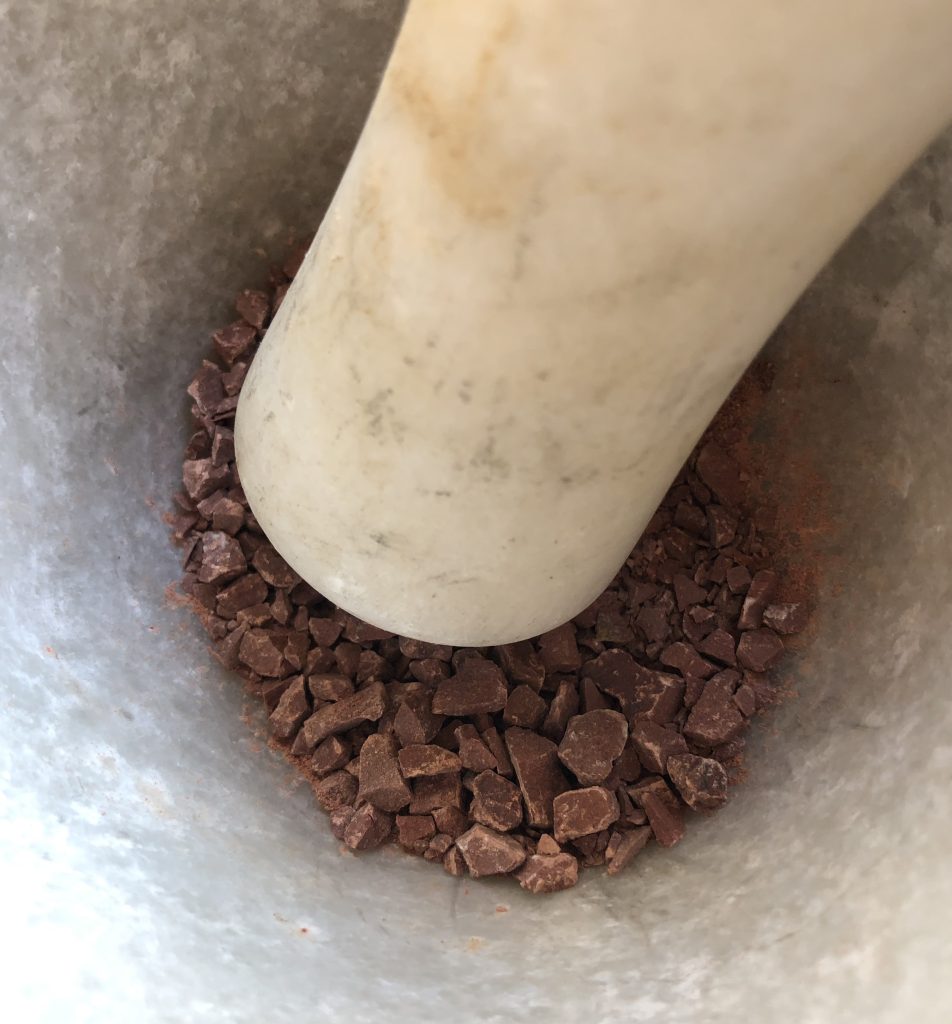
A good way to know if a rock can be used as a pigment is to rub it against another rock. If it leaves a visible trace, there’s a good chance you’ll be able to extract colour from it. Once I’d selected a few stones, i also decided to experiment with ash, charcoal, and bone.
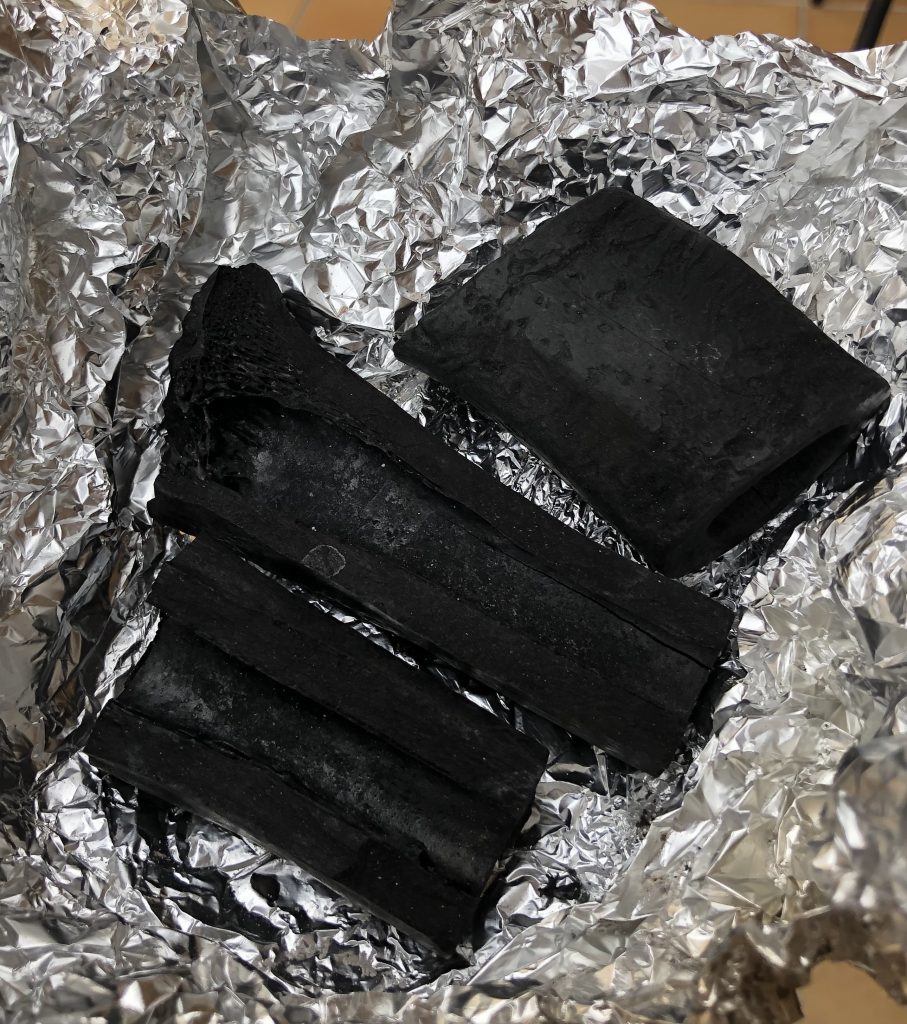
To make charred bone, I wrapped small pieces of cow bone in aluminum foil and placed them inside a cast-iron pot with a lid. I set the pot directly on the fire and left it overnight. The next morning, the bones were perfectly blackened, ready to be ground into a deep, earthy brown pigment.
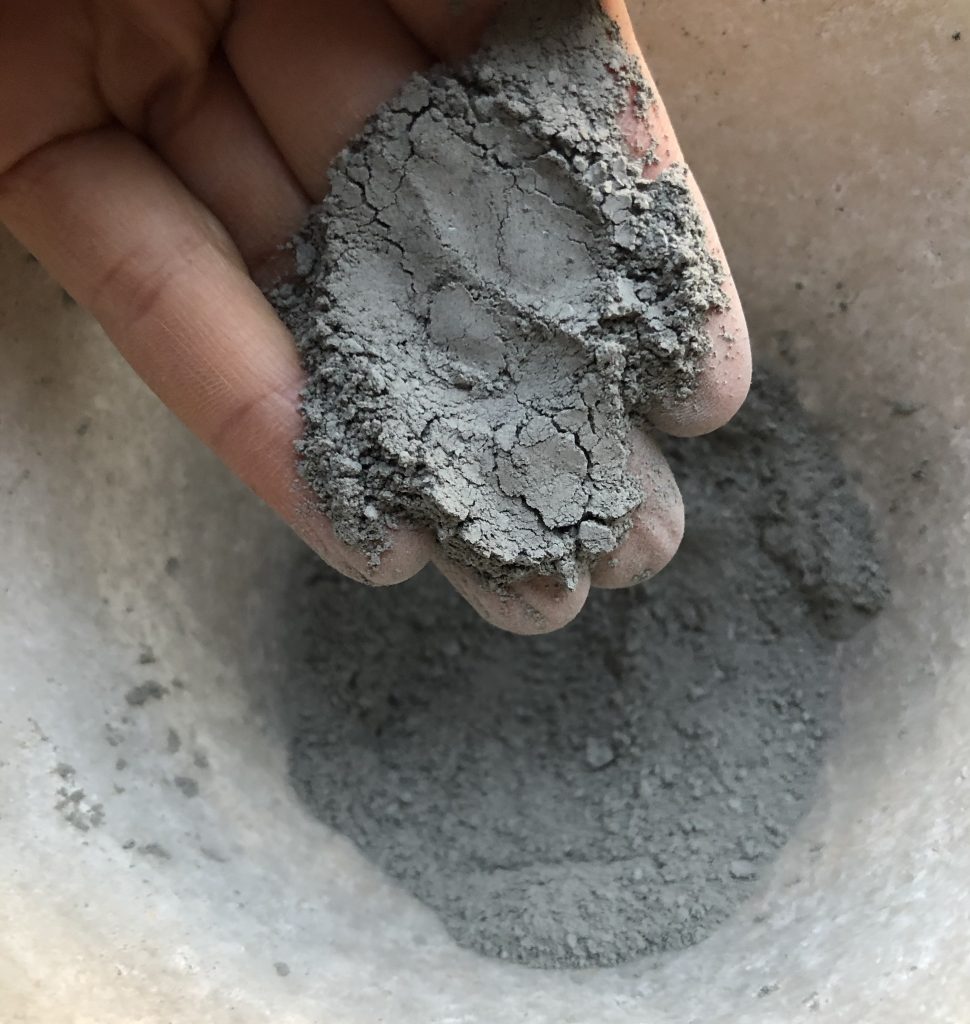
I repeated this process with each material, carefully labelling the jars. It’s a slow process, but one that feels incredibly grounding.

Lake pigments are made from organic materials such as leaves, flowers, fruits or even bark. I gathered beetroot, french marigold, marigold, elderberry leaves, and blackberries, all growing near my home. Each has its own tone and intensity.
This part is simple and aromatic, but the next steps require care and a few more materials.
The chemistry of lake pigments is fascinating but delicate. You’ll need:
Dissolve each one separately in hot water – equal parts by volume (e.g., 5 tsp of powder in 5 tsp of water).
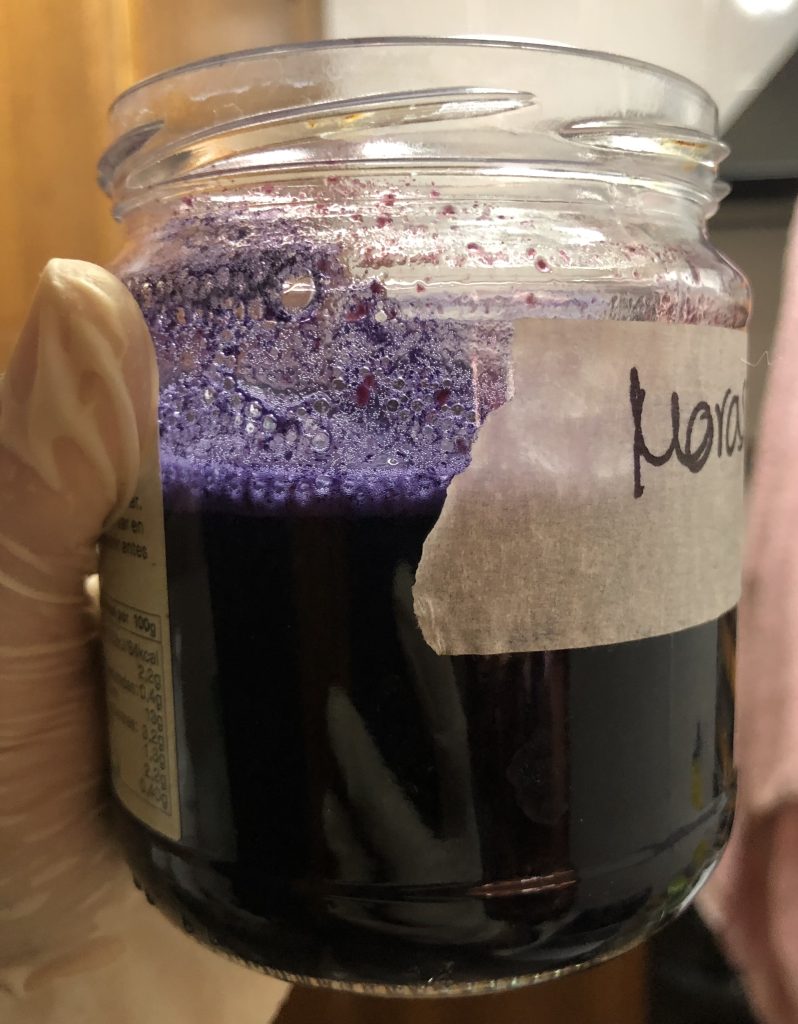
If nothing separates (no sediment is at the bottom), you may need to adjust the pH. I didn’t use a pH kit, so it took me several tries to get it right, especially with blackberries. A neutral pH is key for the pigment to precipitate.
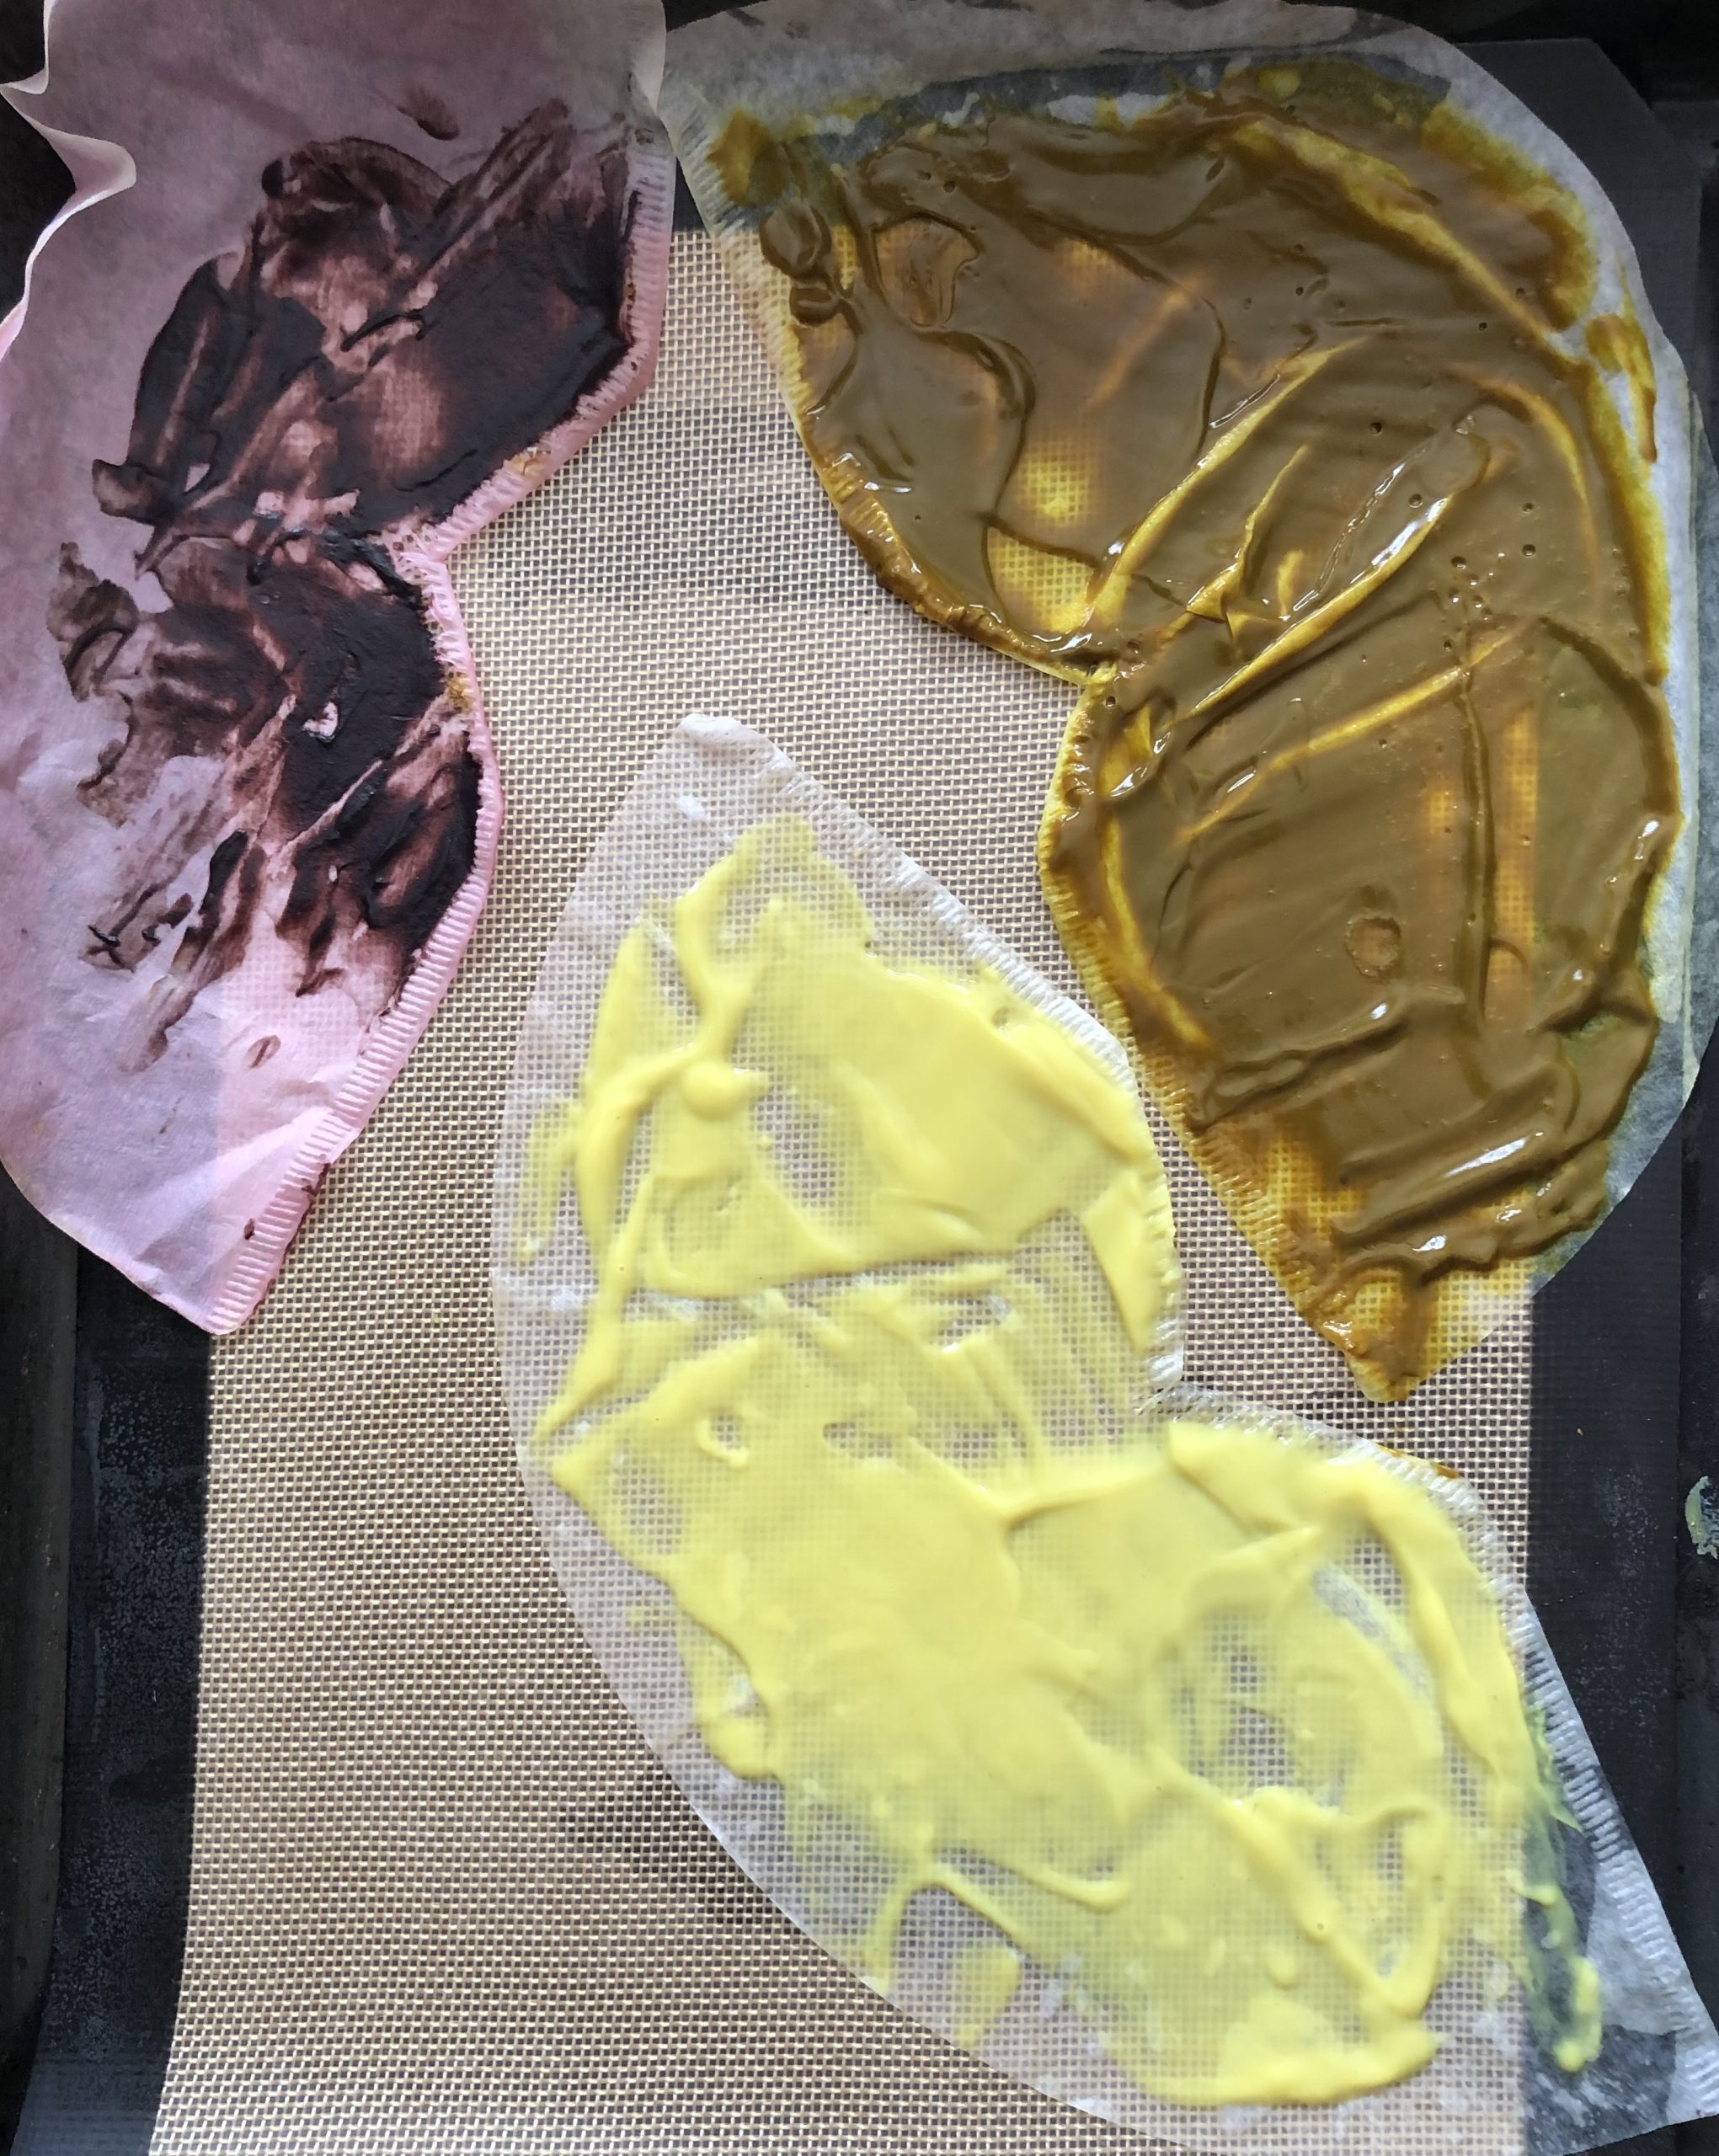
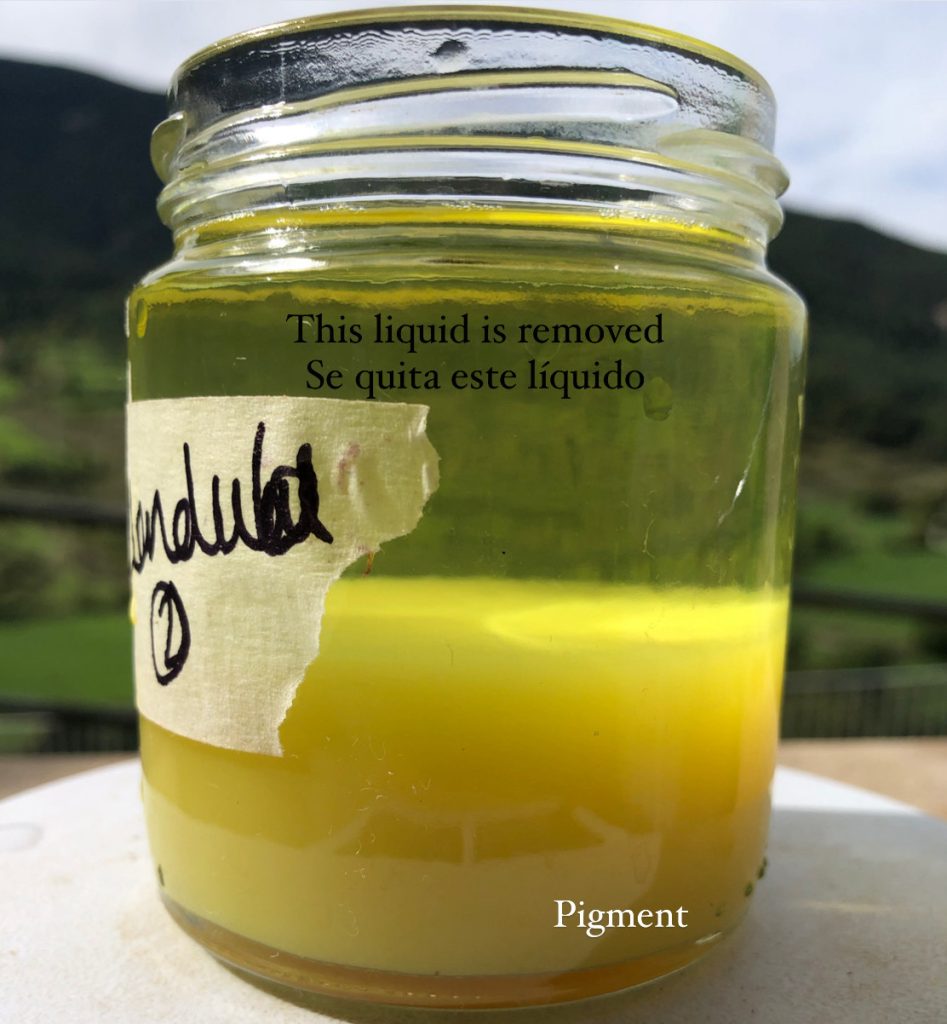
I used a fan and the oven at 40°C (door ajar) to speed up drying. Once fully dry, I ground it again, sifted it, and stored it in a jar. These were my lake pigments.
Once the pigments were ready, I prepared the binder to turn them into paint. This mix binds the powder into a paste that can be applied with a brush and dried in watercolour pans.
I mixed the gum arabic with warm distilled water first, making sure it dissolved without lumps. Then I added the glycerin, honey and essential oil. I stored the mixture in the fridge overnight to allow it to fully dissolve.
This is where the magic happens – combining the pigment with the binder.
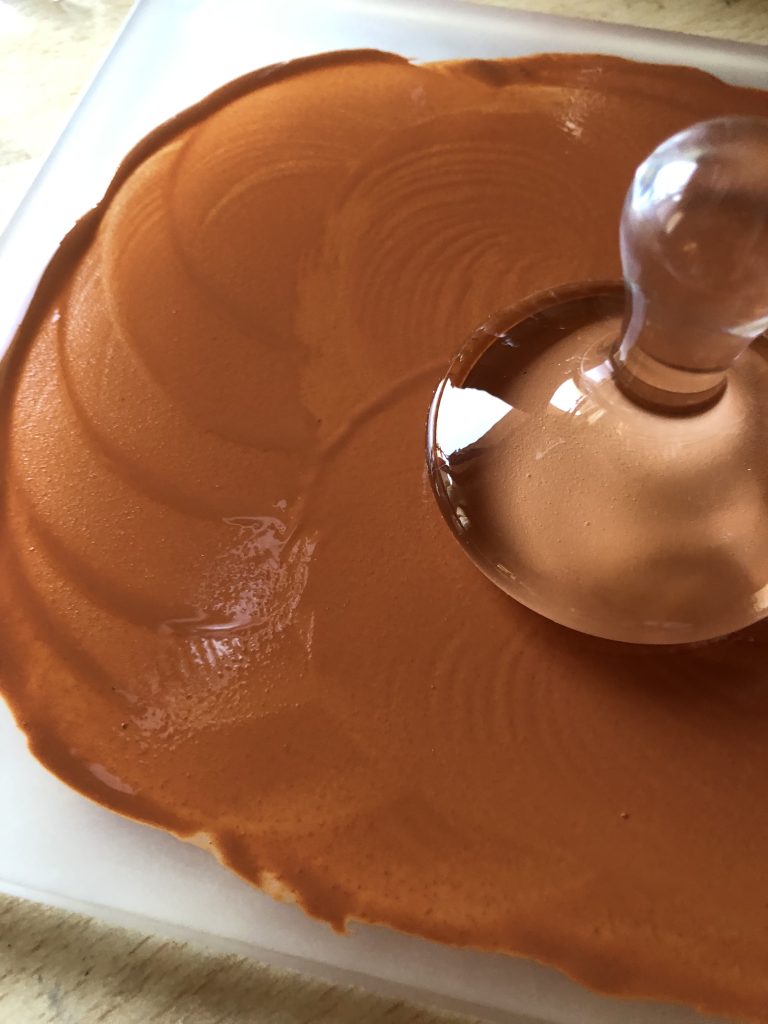
I usually mull for 30 minutes per pigment. Then, I use the palette knife to fill small pans or containers. These paints dry slowly and retain their colour beautifully. Each one carries its own story.
Mineral pigments come from rocks, ash or bone and are physically ground. Lake pigments are extracted through a chemical process from organic material like plants or berries.
not necessarily, but it helps. a neutral pH is essential for proper pigment separation. Without a kit, you may need trial and error to get the balance right.
With proper preservation (binder, essential oils, dry storage), they can last for years. The key is to keep moisture away and use natural preservatives in the binder.
This process taught me to slow down and listen. To notice colour not as something bought in a tube, but as something that already lives in the land. I don’t think you need to be an expert to start this journey-just curious and willing to get your hands dirty.
You can see more of my pigment-based works and artistic explorations on my Instagram account @valentina_abadia_art and in my online gallery.